
Introduction
Corvus Live Monitor is the first of a suite of Mobile Applications that will be available for the Corvus application. It provides an easy way to utilise key Corvus functionality from a mobile device.
Much like Corvus Axiom, Live Monitor provides a way to display production data sourced from Fleet systems and combined within the Corvus database. This data is then transformed into a mobile format and
displayed on your Apple or Android device. It’s another way in which Corvus assists in managing data and improving performance across the business.
Resource Tracking
Equipment and their current status is streamed directly to your device. Key content includes:
- Resource Type
- Resource Id
- Resource Status
- Current Operator
- Resource Location
Corvus Maps
Leveraging maps provided by a number of different sources – Corvus Live Monitor transfers GPS coordinates into an easy way to visualise your equipment on the site in near real time.
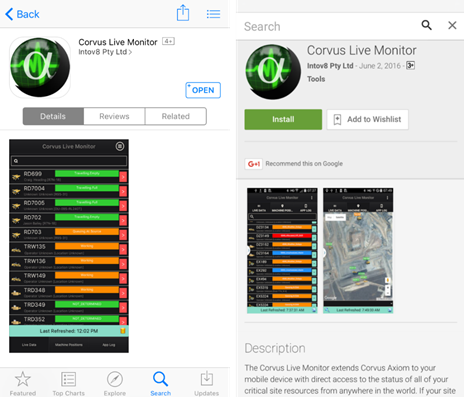
Downloading Corvus Live Monitor
Corvus Live Monitor can be downloaded via the Apple App Store or Google Play:
Apple App Store: iTunes
Google Play: App Store
Auto Provisioning for Corvus Live Monitor
The below video provides the auto provisioning guide for Corvus Live Monitor
Getting Started – Corvus Live Monitor
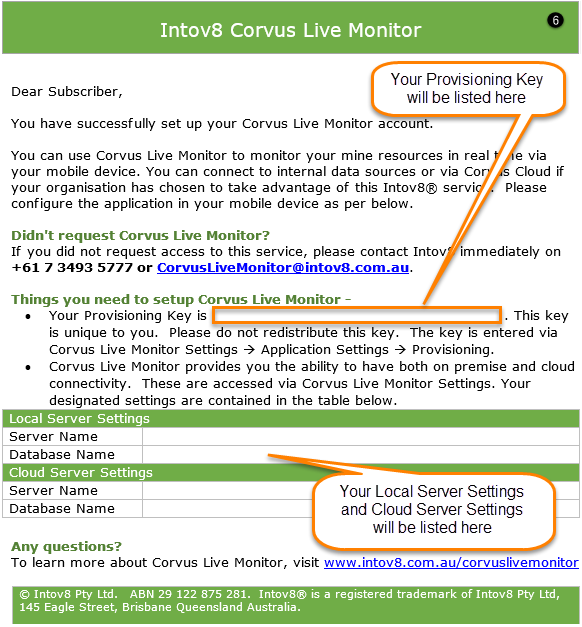
You will receive an email from CorvusLiveMonitor@intov8.com.au which includes your Provisioning Key and other required settings:
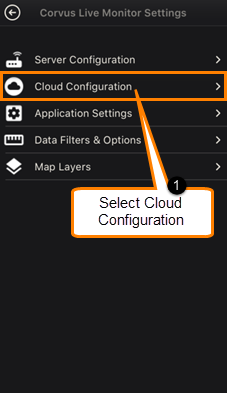
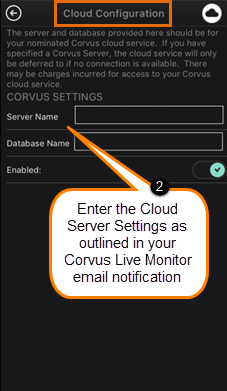
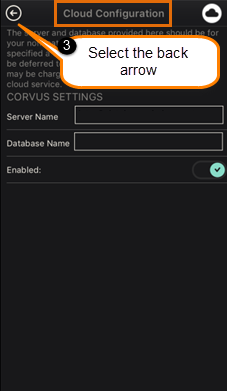
Configuring Cloud Settings
| Step1 | Step2 | Step3 |
|---|---|---|
 |
 |
 |
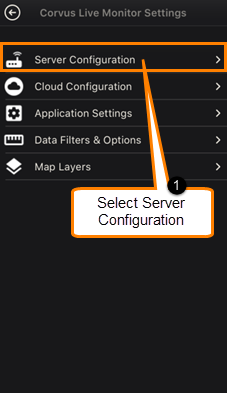
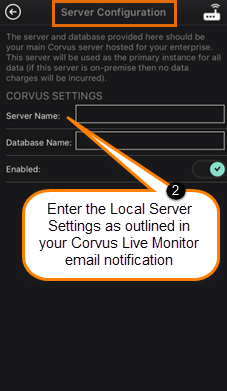
Configuring Server Settings
| Step1 | Step2 | Step3 |
|---|---|---|
 |
 |
 |
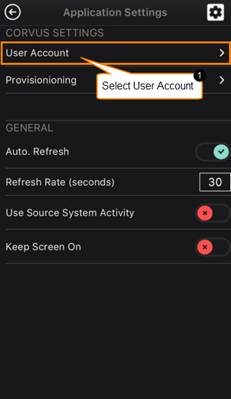
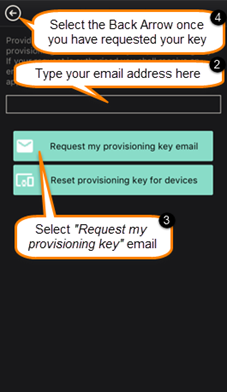
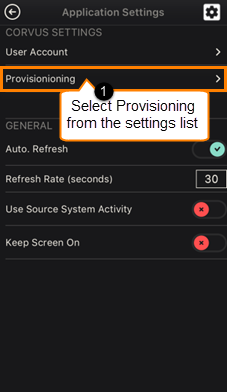
Provisioning
| Step1 | Step2 |
|---|---|
 |
 |
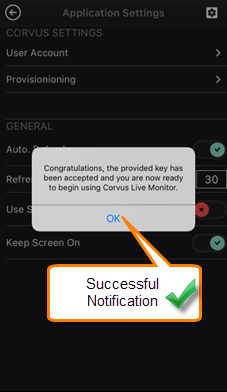
Successful Provisioning
Unsuccessful Provisioning
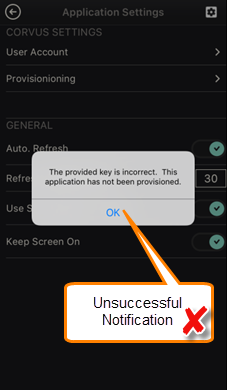
Trouble Shooting Hints if you are Unsuccessful
- Ensure the email address that you have inserted is in fact a valid email address. If you receive the Corvus Live Monitor email notification, check this matches what has been inserted into the app
- Ensure the [Cloud Configuration details have been inserted as the first step (rather than the [Server
Configuration) – ensure you have network coverage while doing so - Ensure there are no extra spaces around the provisioning key – copy and paste is preferred