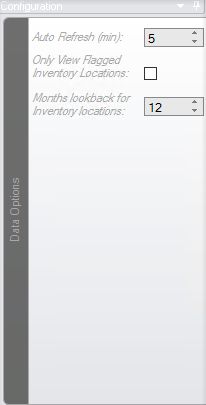
The Configuration options pane provides a couple of Data Options for viewing the data in the main Events Window.
These are shown in the screenshot below:
- Auto Refresh (min): option determines the period for automatic refreshing if this is switched on the main toolbar, this can be useful for in-shift tracking of inventories
- Only View Flagged Inventory Locations: option can be used to effectively rule out multi-level locations from the view (such as inpit locations), this can be used to improve any performance issues and will limit the result set as there can be a large number of these locations returned generally
- Months lookback for Inventory Locations: This option can be utilized when multi-level locations are included, this is the effective period to lookback in history for movements to determine what locations are included
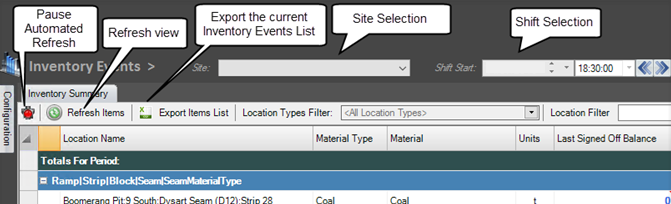
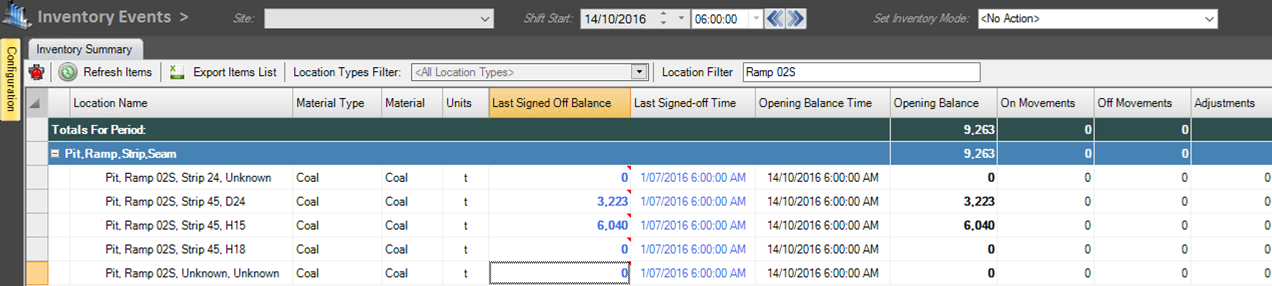
Inventory Summary
This is the main pane on the form. It lists the Configured Inventory Points and the actions against those configured items that are stored in the database for the currently selected shift. Options available on the
pane are shown in the screenshot below:
A number of options are available on the form for changing the selected Inventory Event. These are accessed by right- clicking on the required Inventory Event. As shown below, the status of the Inventory Event can be updated, Signoffs can be created and Different types of Adjustments can be created.
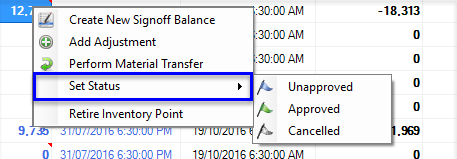
A status change requires right clicking on the specific cell. The cells that allow status changes are those that can be modified and are:
- Last Signed Off Value
- Adjustments
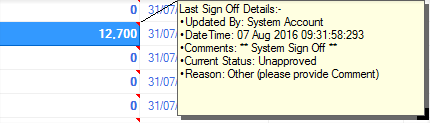
To view information and the status of these items, mouse hover over the cell to view a pop-up comment. Those with comments are also highlighted with a small red triangle in the top right corner.
Note: The ability to Create Signoffs, Adjustments and Material Transfers is controlled by the following –
- The shift must be in Signing Off mode
- The relevant attributes must be set as enabled against the applicable Site/Location Type combination. For example, the AllowManualAdjustment attribute may be set ON for Site A, but OFF for Site B across various Location Types at that site.
To apply an Inventory Signoff, the relevant shift needs to set into “Signing Off” mode –
WARNING:
Setting a shift into “Signing Off” mode will set every prior shift for the site in question into “Signing Off” mode. “Signing Off” mode is a shift state that sites above the “Locked” state. This means that no edits to underlying Process Activity data will be permitted. This process will normally only be undertaken once all
measures have been deemed as true and correct as part of an end of month process. “Signing Off” mode is represented by a Blue Padlock on all Corvus Process Activity screens.
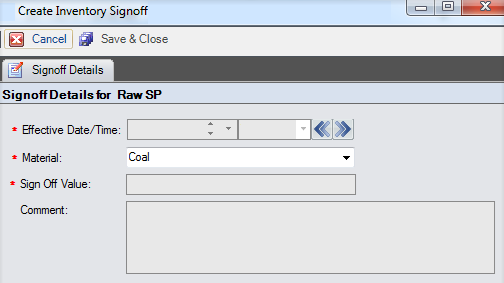
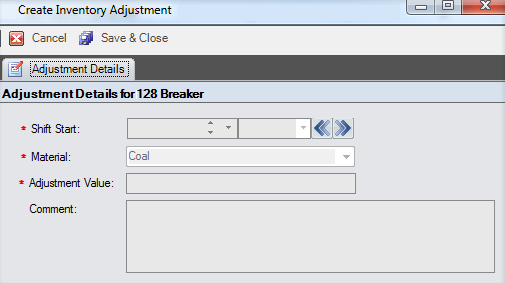
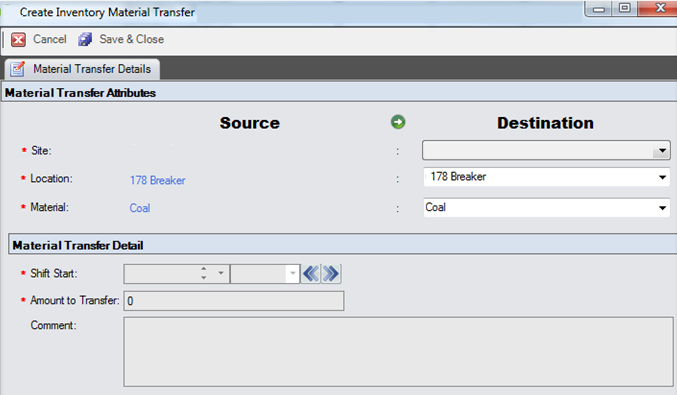
Creating a Signoff, Adding an adjustment or creating a material Transfer will provide the user with a pop-up that requires relevant data be added.
Create Inventory Signoff:
Create Inventory Adjustment:
Create Inventory Material Transfer:
Please note: once a shift has had signed off data entered, that shift and [all prior shifts will be entered into a “Signed Off” state. The “Signed Off” state is represented by a Purple Padlock.
Retiring Inventory Points
Users now have the ability to retire Inventory Points. Please follow the below steps:
- Choose Inventory Point, right click and select Retire Inventory Point
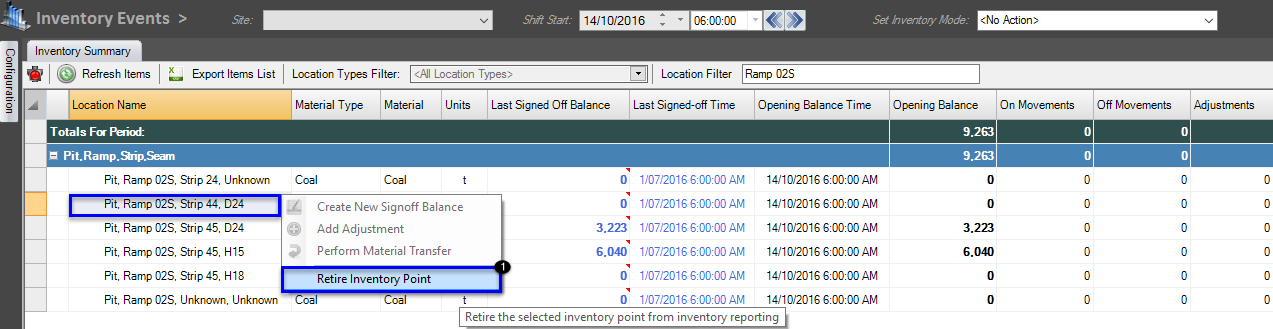
- You will receive a pop-up box, requesting confirmation, select Yes to proceed
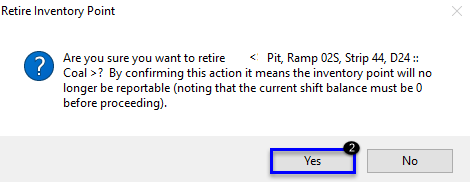
- Once Retired
- An audit history will be maintained of these actions
